Lost Wax Casting 101
These are stonecrop plants cast in sterling silver. The silver is white because they just came out of an acid bath we call the pickle.The disc tool above is a rotary grinder that we use to grind and shape metal pieces. You can see a few pieces already soldered onto a ring shank in the background.
Metal casting is a unique art. I say that because a lot of the processes feel like science.
There is a great deal of measurement and exactitude, lots of tools, machines, tanks of gas, chemicals & fire.
Casting is done in lab-like conditions with safety equipment, and there are many variables, and combinations of variables that can lead to success or... total failure!
The basic idea is to take an organic model, encase it in a steel flask and pour plaster around it. When you fire the flask the plaster hardens into a ceramic and your wax or organic model burns away, and is "lost."
Then you heat silver until it's molten, and pour it into the hole left by your organic model. The plaster with the silver inside cools, and when you dunk the whole think in water the plaster breaks up and you have a raw casting.
Step 1: Prepare your wax or organic model
Wax comes in many varieties; hard wax, soft wax, sheet wax, sticky wax and combinations in between.
Our models are produced in 3 ways; wax sculptures or carvings, live plant material, or 3D printed waxes. Regardless of how we make the original, the actual casting process is relatively the same for each piece. Some may have to cook longer, but that's about the only difference.
Step 2: Invest the models
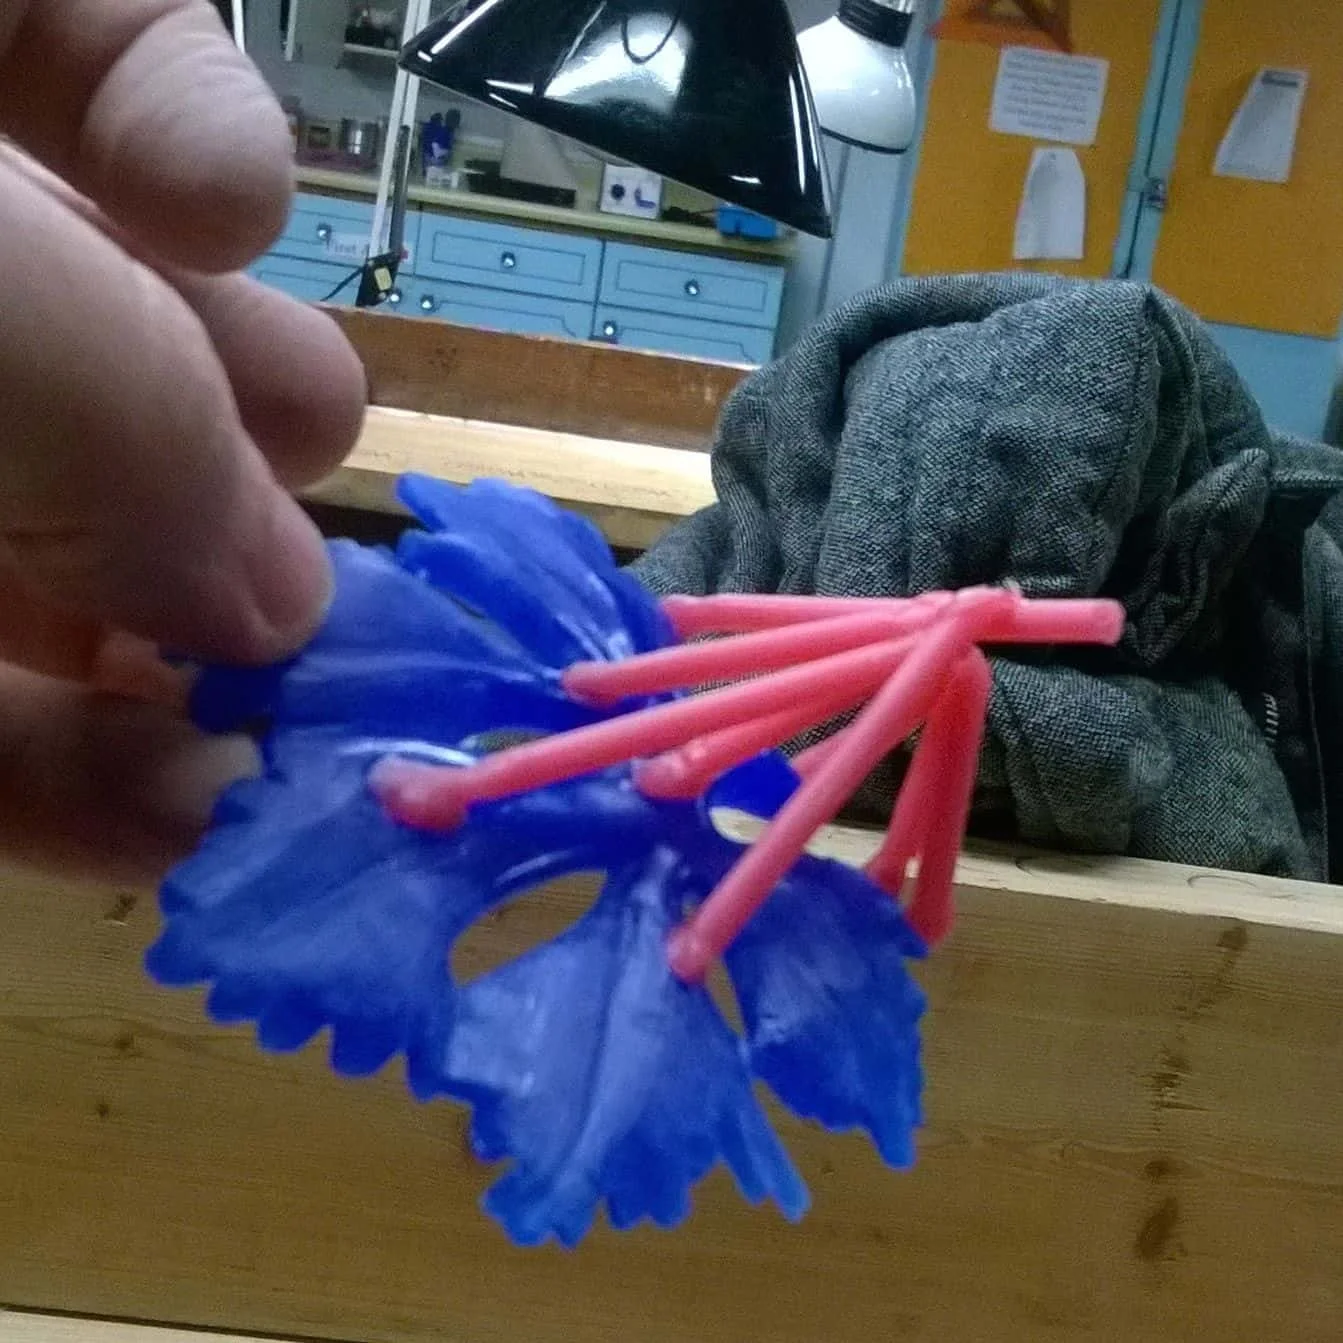
Once you have a wax sculpture or a piece of organic material you attach pink sprue wax to it. These wax rods become the flow channels for the metal you will pour.
A metal flask is secured onto the rubber base and then filled with a special jeweler's plaster. This plaster is called investment and each flask we cast has to first be "invested." It makes me feel very fiscally conscious. The plaster encases the wax models, hardens and then we pull the rubber bottom off and put them in the kiln.
Step 3: Cook the flasks
We cook these flasks in the kiln for 6-8 hours, the temperature rises slowly to about 1400 degrees fahrenheit. After a couple hours on high heat, they are brought back down to about 1000 degrees, where they settle for about an hour before you pour the metal.
The video above shows us pouring metal. This is always a 2 person job, one with their hands on the torch and the crucible containing the molten metal, and the other to put on thick, thick gloves and carry the searing flask from the kiln to the vacuum table.
Step 4: Pour the lava
Calling it lava just makes me feel important, but we work in silver, gold, and bronze. Each metal melts at different temperatures, anywhere from 1500-2000 degrees fahrenheit (850-1100 Celsius.) The torch uses oxygen and acetylene to produce fire, and a clean heating and smooth pouring of the metal are essential.
Step 5: Surprise!
Usually we get what we expect to get from our castings, but it's still a surprise sometimes to see the piece in it's metal form. After the flask cools for a bit, we dunk it in a bucket of water. This breaks up the plaster and you get a raw casting attached to several sprue channels.
These channels are first sawed off, and then a variety of other finishing techniques (grinding, sanding, drilling, soldering, etc...) take the piece from a grey or brown husk of metal into a shiny treasure.
Trouble-Shooting
Casting metal correctly is heavily dependent on reaching and maintaining consistent temperatures. The molten metal must be hot enough to flow into plaster channels, but if it is too hot it can create porosity on the surface of the finished piece. Little pockets of air make the surface uneven, and if you sand them down you just end up uncovering new pockets of air.
The other half of the battle is to attach the pieces to channels that supply the flow of silver or gold in a way that anticipates the direction and cooling of molten metal. Pieces must be thick enough, and attached to take gravity and vacuum pressure into account.


